


UTrading is moving to the next level: the bot can now trade directly on decentralized exchanges (DEX). This is not just a new feature but a large-scale shift from centralized exchanges to decentralized trading. The first DEX to be connected is Uniswap, which runs on the Ethereum blockchain — there the bot trades the ULTIMA/USDT pair.
Unlike centralized exchanges, Uniswap has no conventional order book and no intermediaries: trades are executed automatically through liquidity pools directly on the blockchain. Connecting takes just a few minutes — after that the bot interacts with the pool on its own and trades 24/7 while you go about your business. You stay in control of your funds: withdrawals are only possible to the wallet used to activate the bot.
Uniswap runs on the Ethereum network, so every transaction incurs a network fee (gas) paid in ETH. Before activating the bot, make sure your UWallet has a sufficient ETH balance — without it you will not be able to top up your Trading and Fee balances.
In this guide we will show you how to make the switch: first you close your activity on your current exchange, then you activate the bot on Uniswap through your UWallet. No separate registration on Uniswap is required — the entire process takes place through the UTrading website and the UWallet app.
Step 1. Close your current bots
Open the dashboard, where you will see your current performance values. Please note that you can add a bot on a DEX at any performance level:
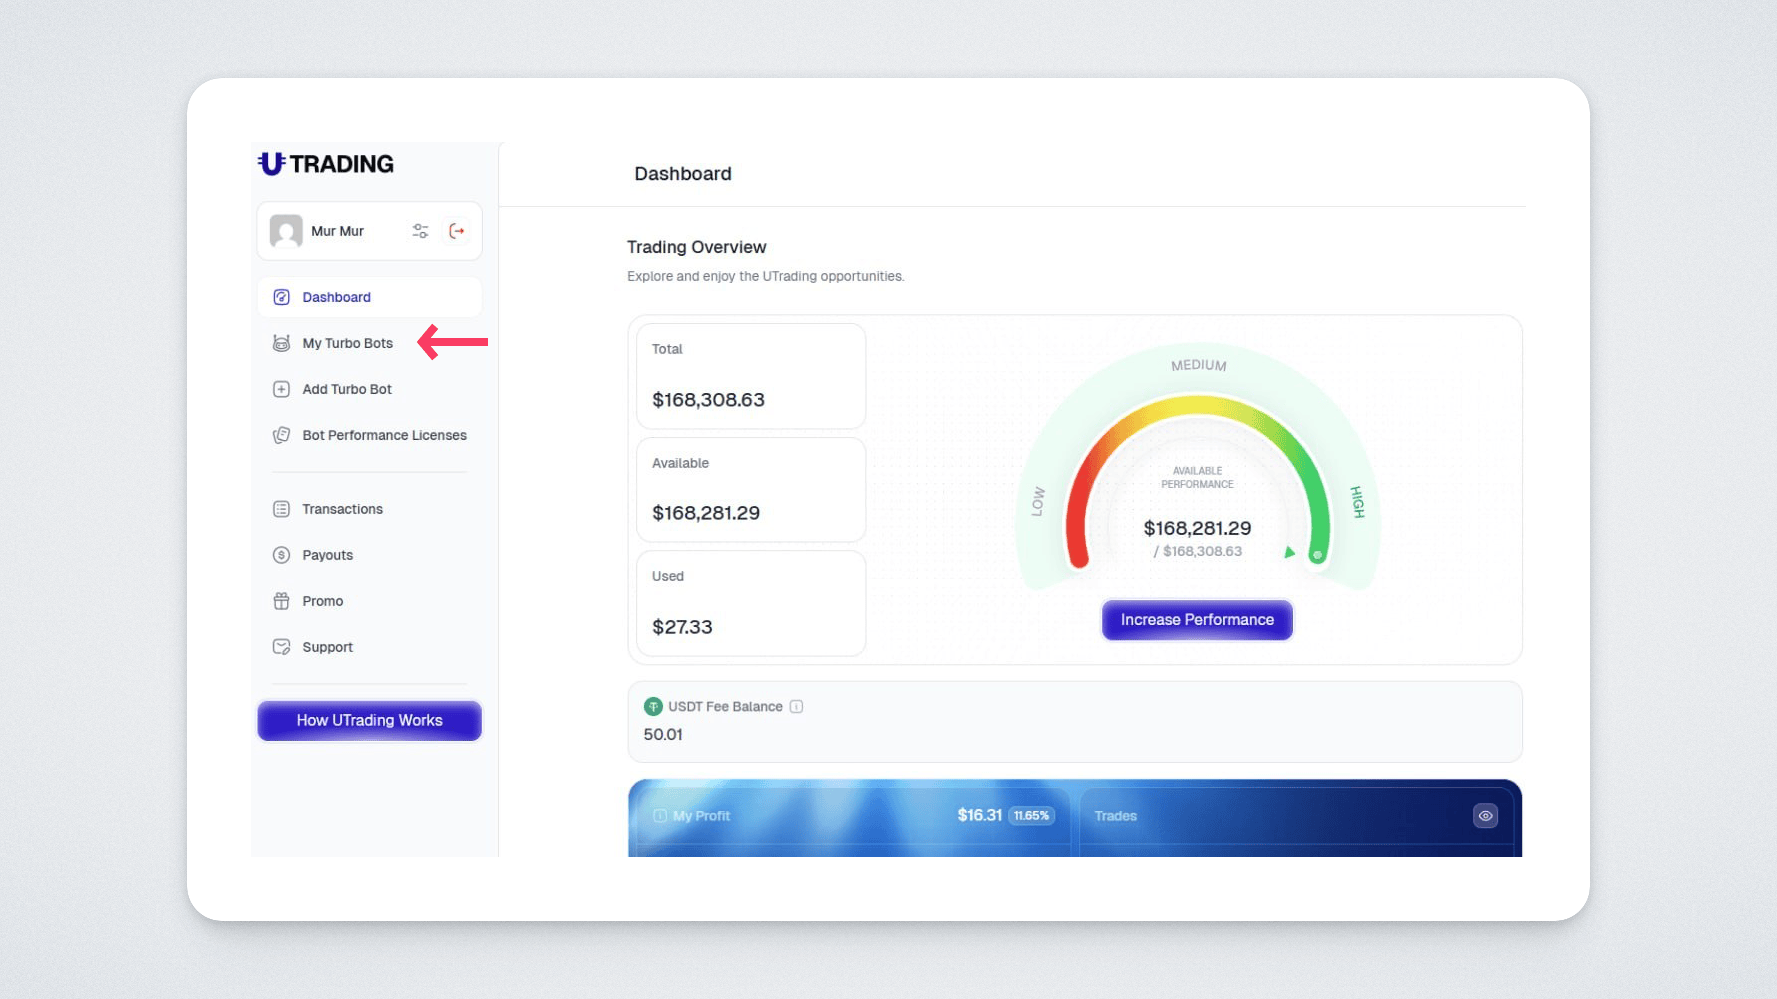
Open the «My Turbo Bots» section and close the bots that are currently trading on centralized exchanges, as well as any limit orders remaining on the exchange.
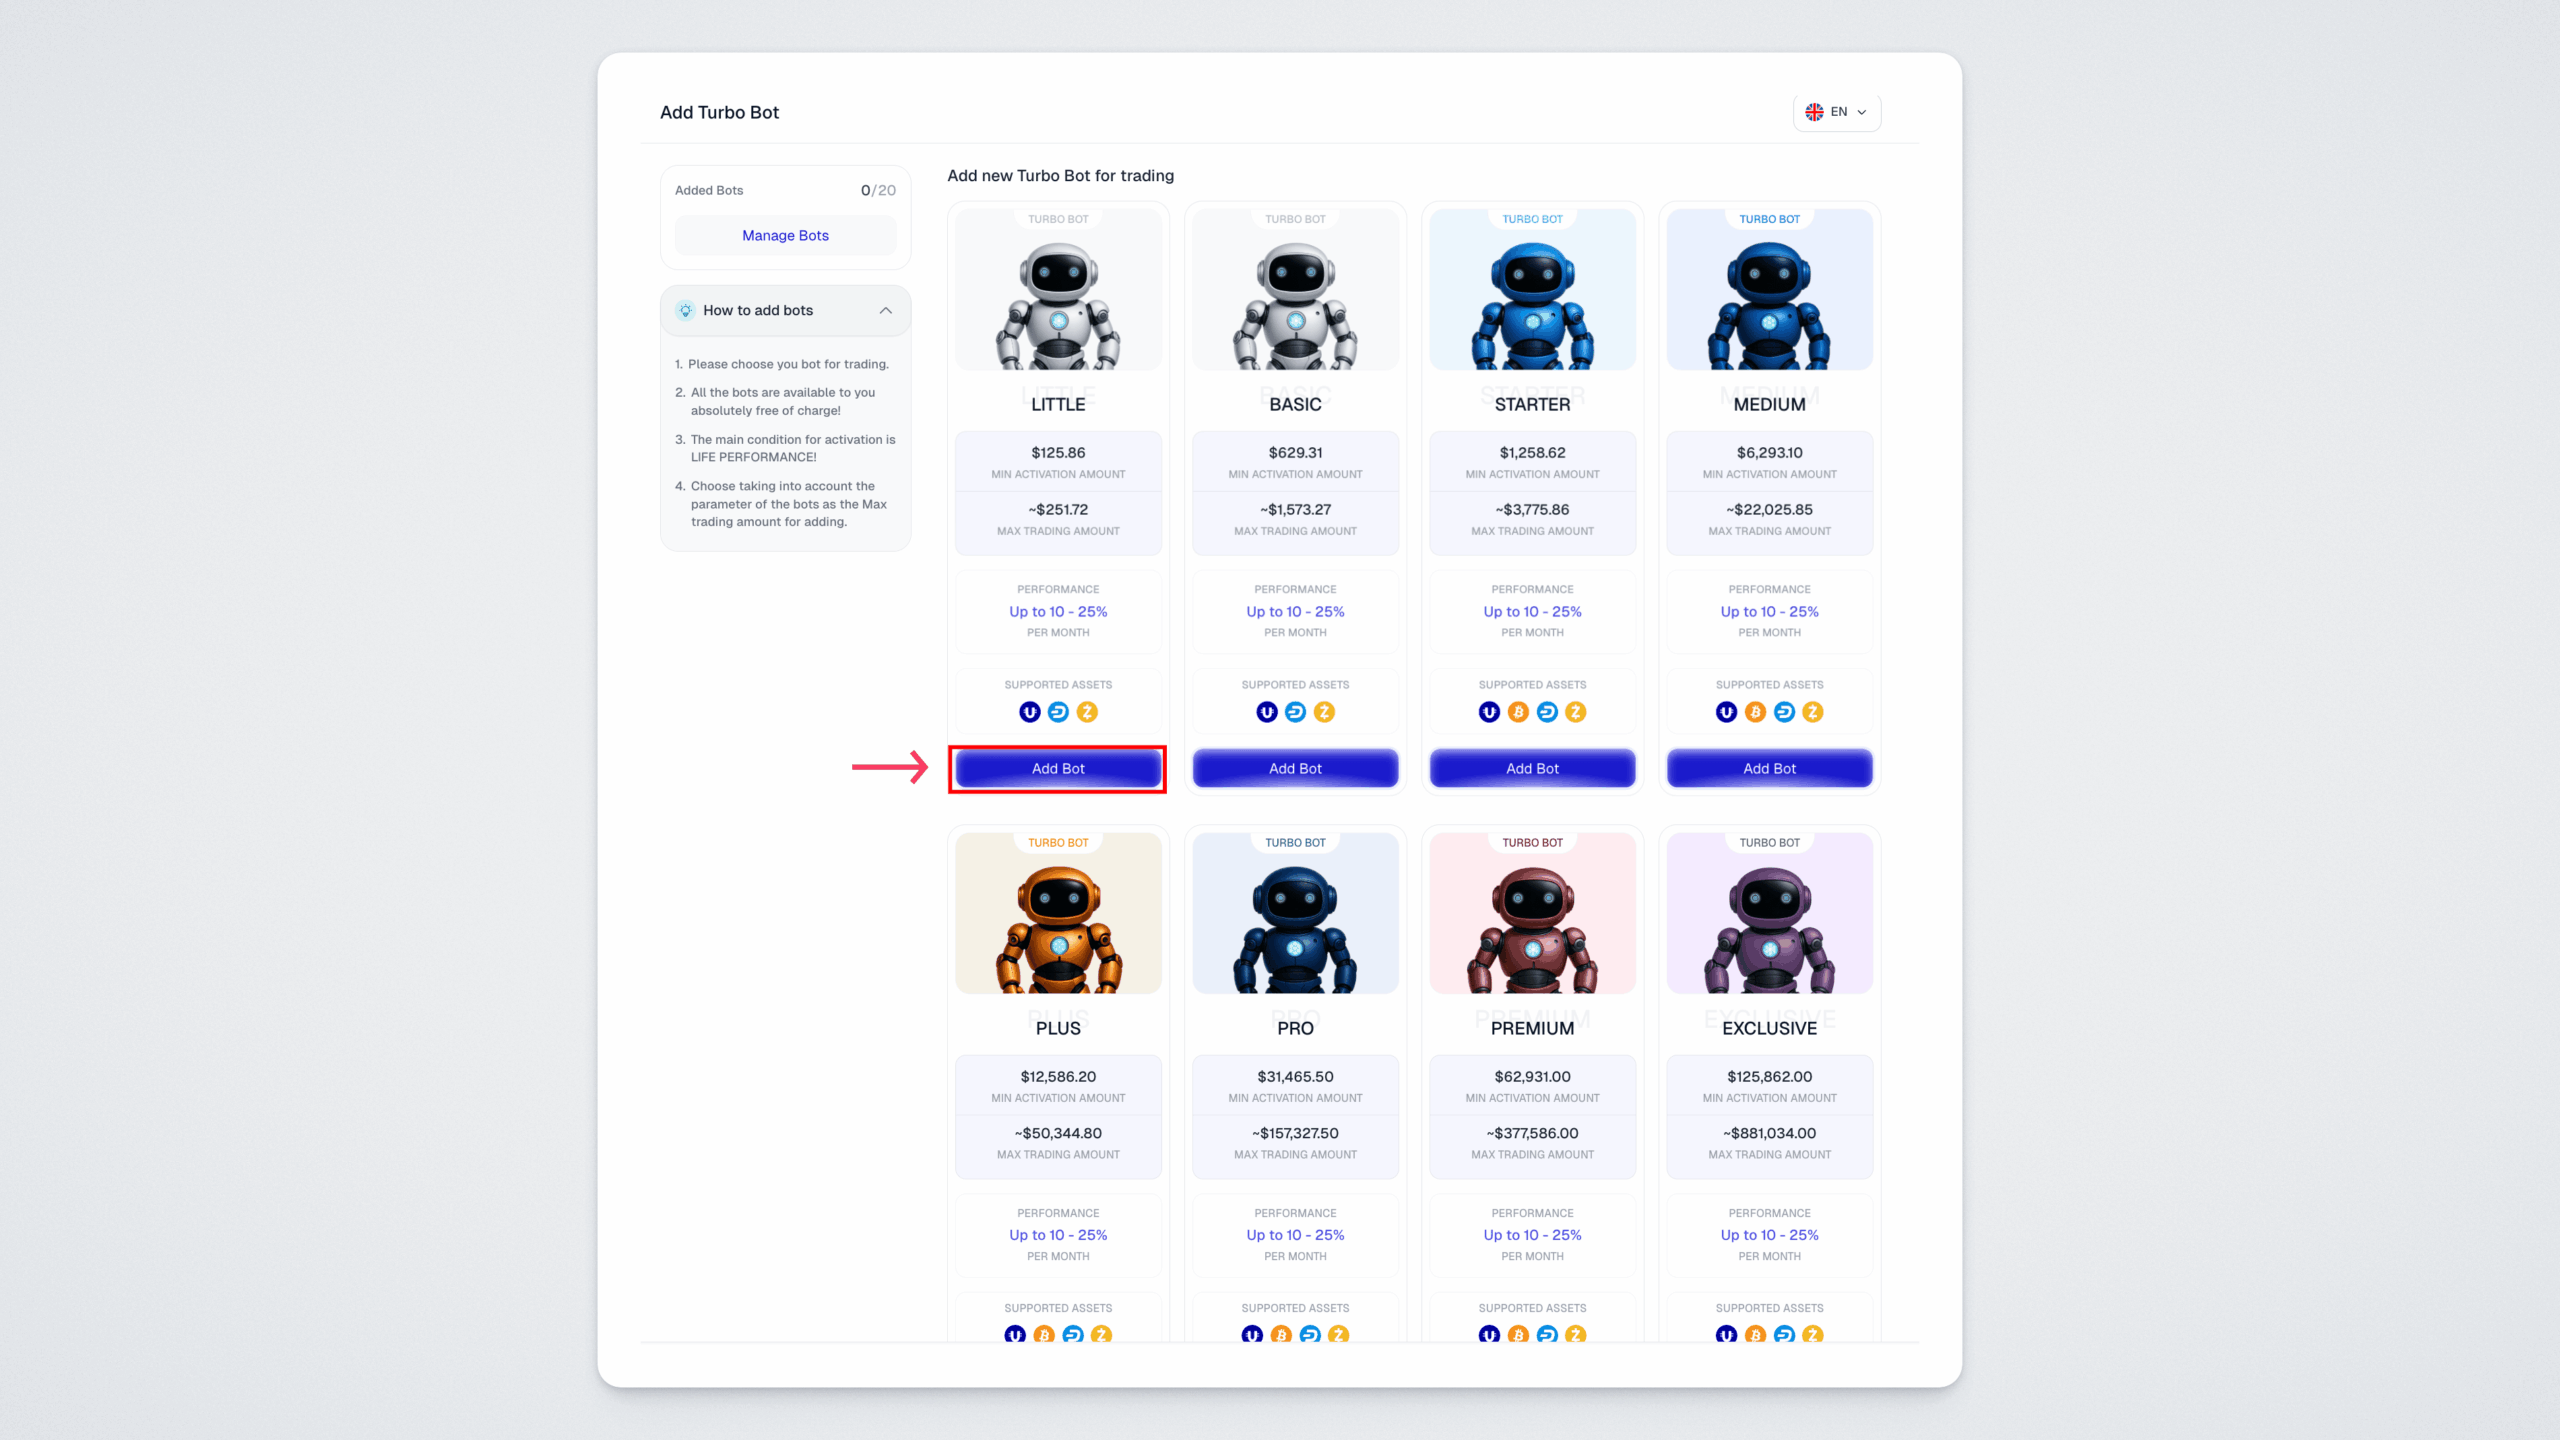
Choose the bot that suits you and add it.
At the activation stage, select Uniswap.
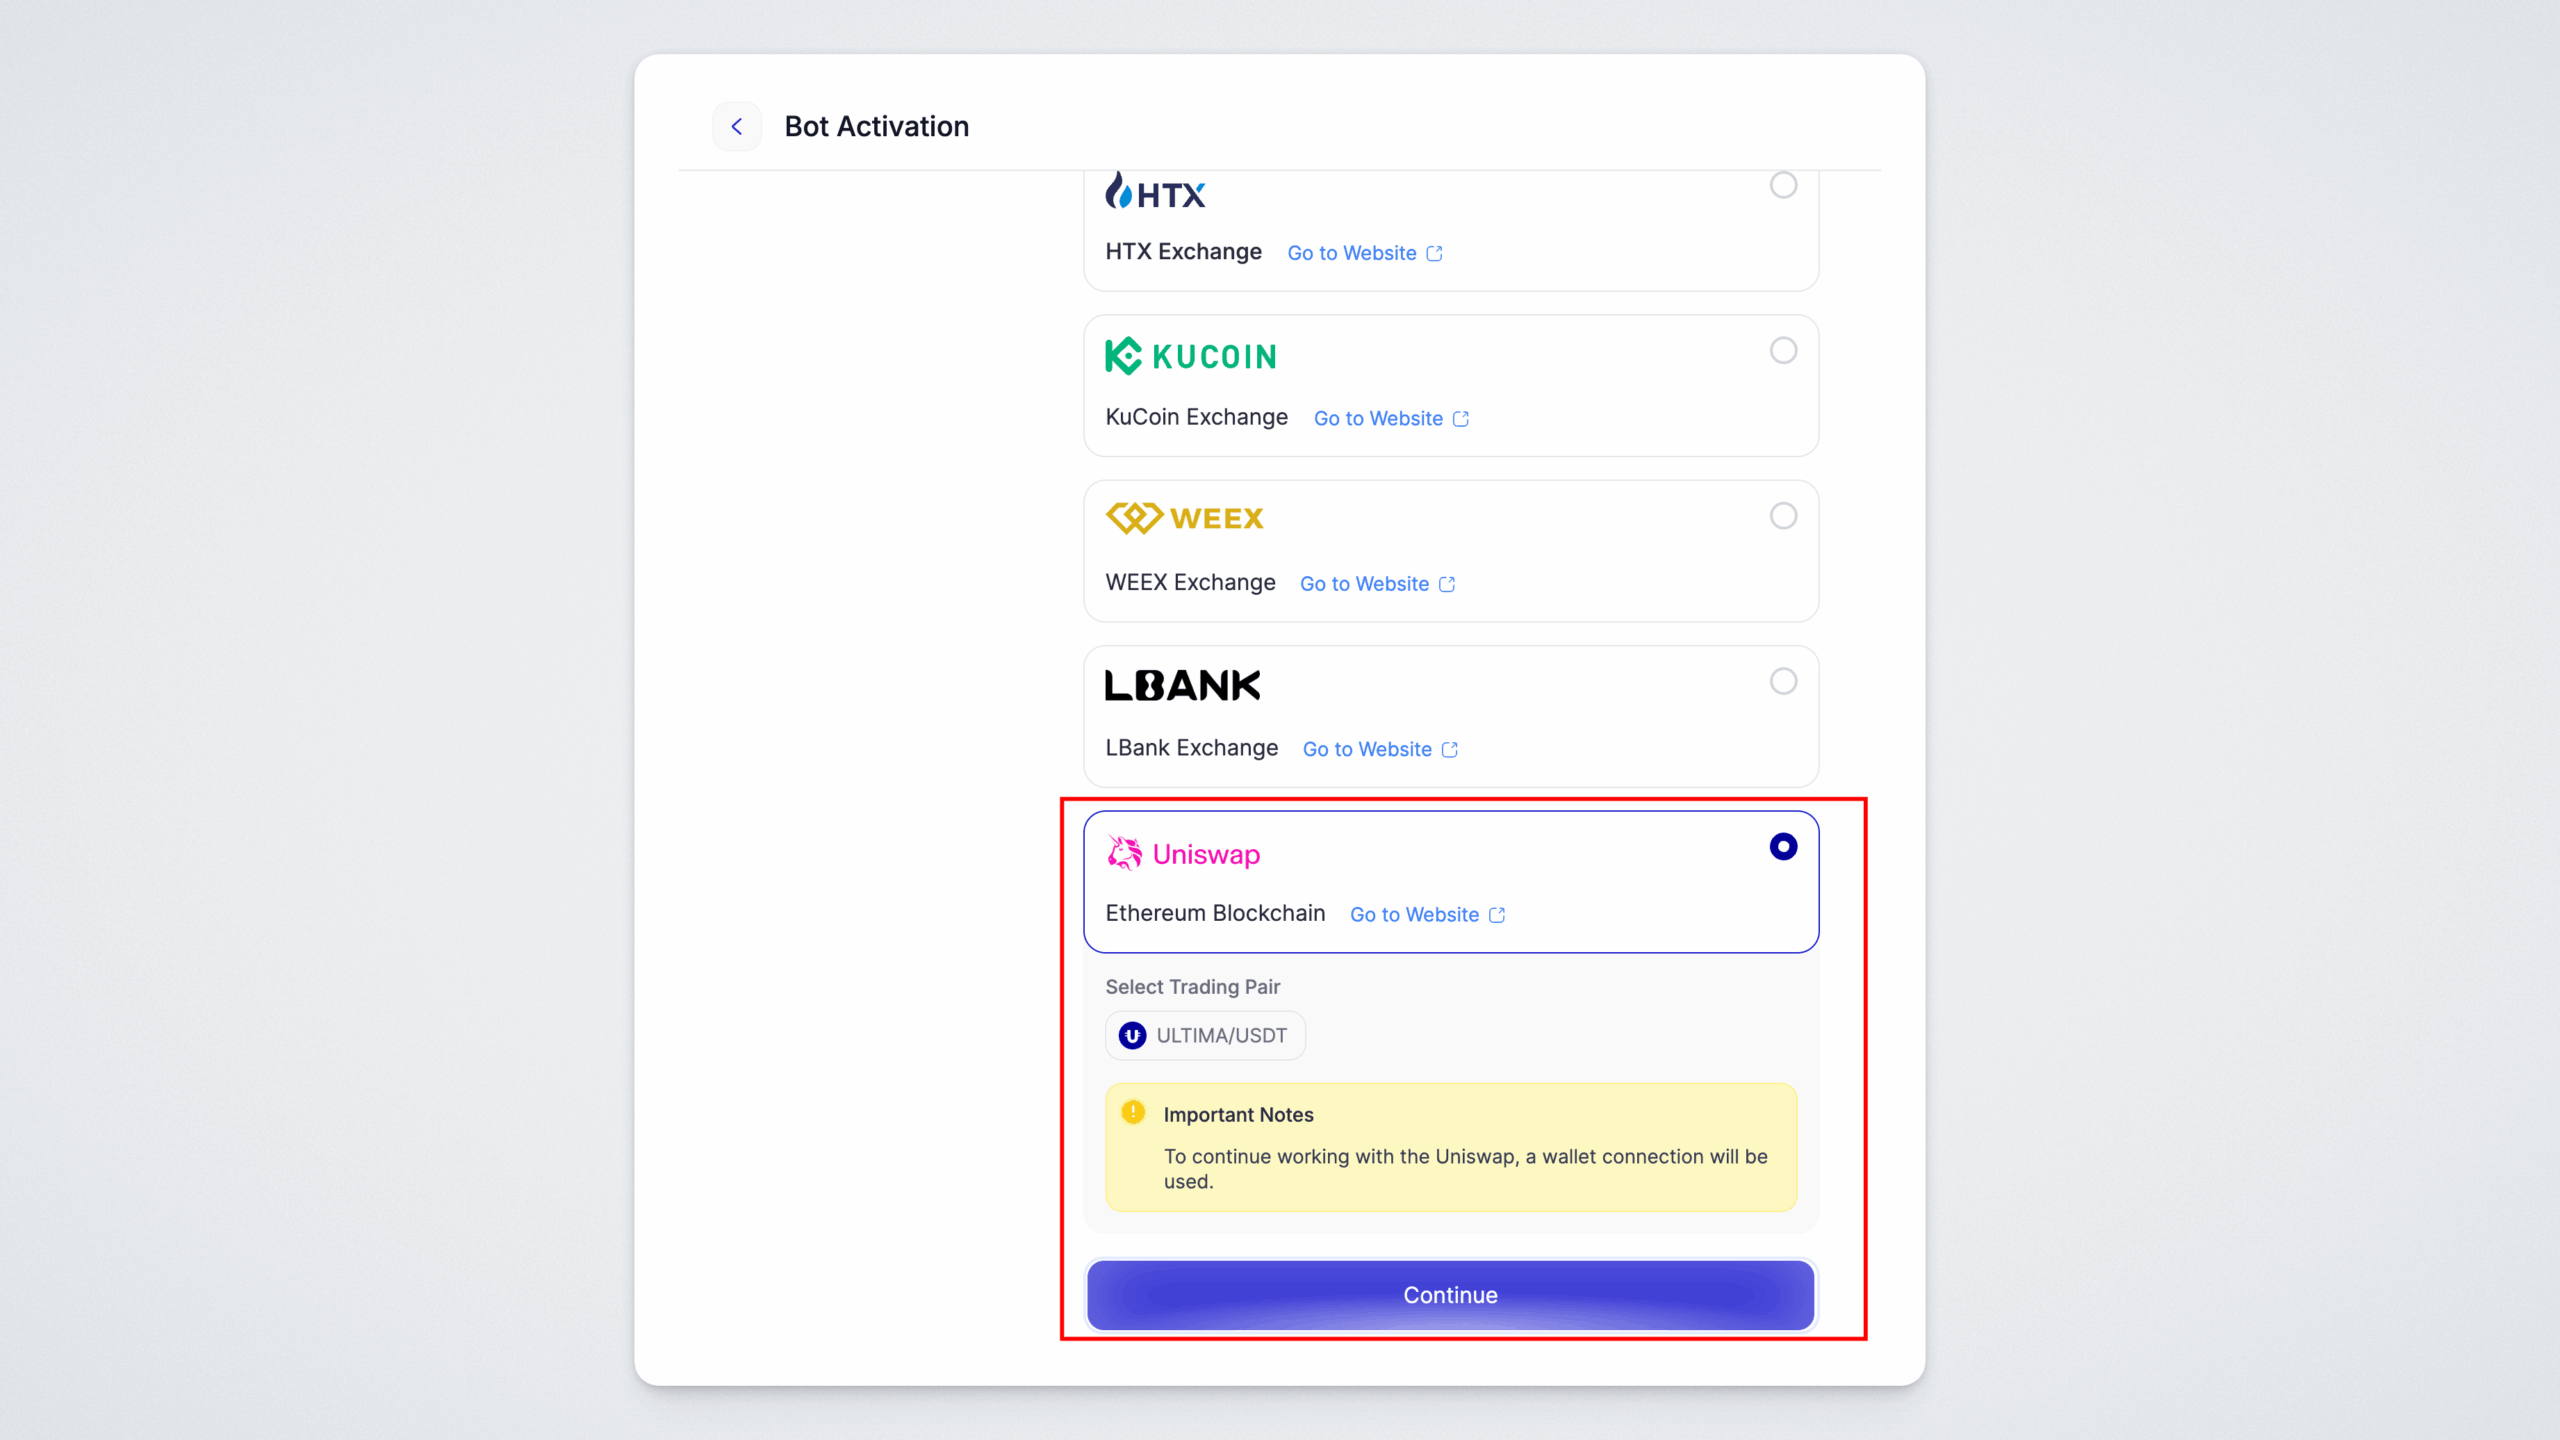
The wallet connection page will then open — let's move on to it.
Step 3. Connect your UWallet
Click the Connect Wallet button on the connection page, scan the QR code with the UWallet app and confirm the connection.
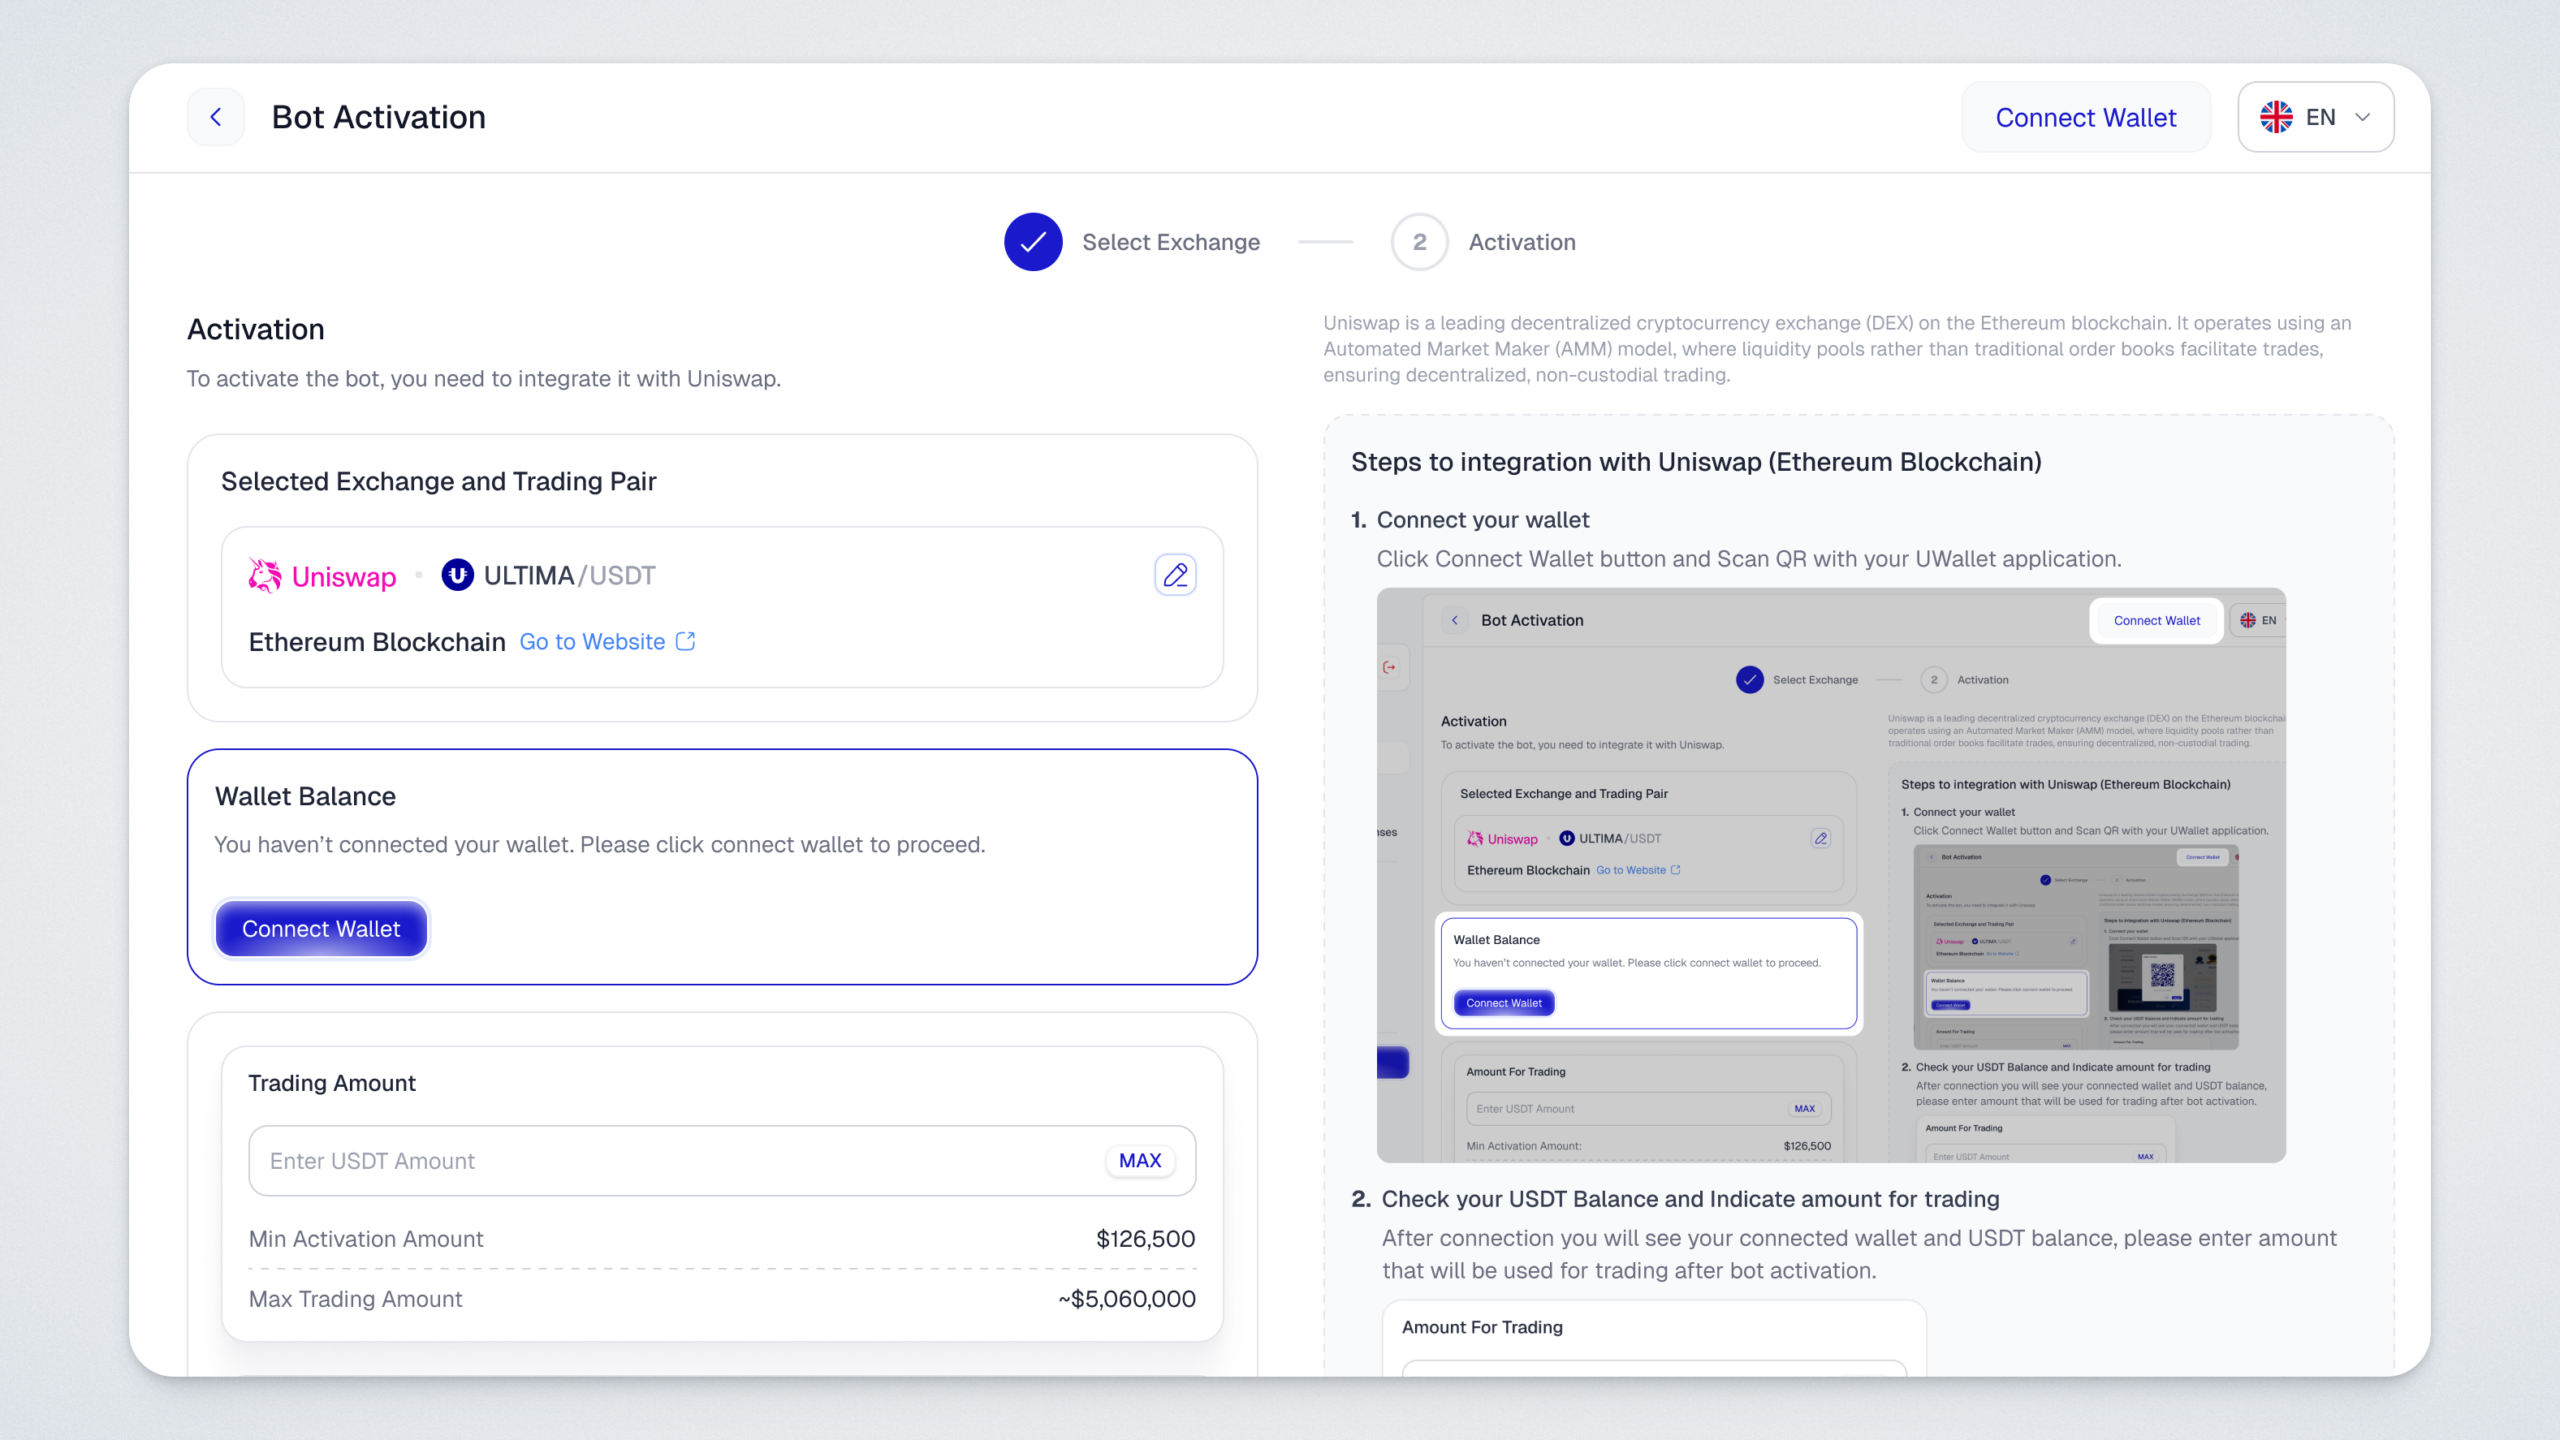
Please note: the wallet connection (WalletConnect) session lasts 7 days — this limit applies only to the connection itself, not to the bot. The bot keeps trading without interruption, and you don't need to stop it or reactivate it. If the session expires and the system requires a new confirmation (for example, for the next transaction), simply reconnect your wallet the same way — by scanning the QR code.
Step 4. Set the trading amount
Once connected, on the same page you will see the USDT balance of the connected wallet. Enter the amount the bot will trade with. Use the minimum and maximum amounts shown below as a reference.
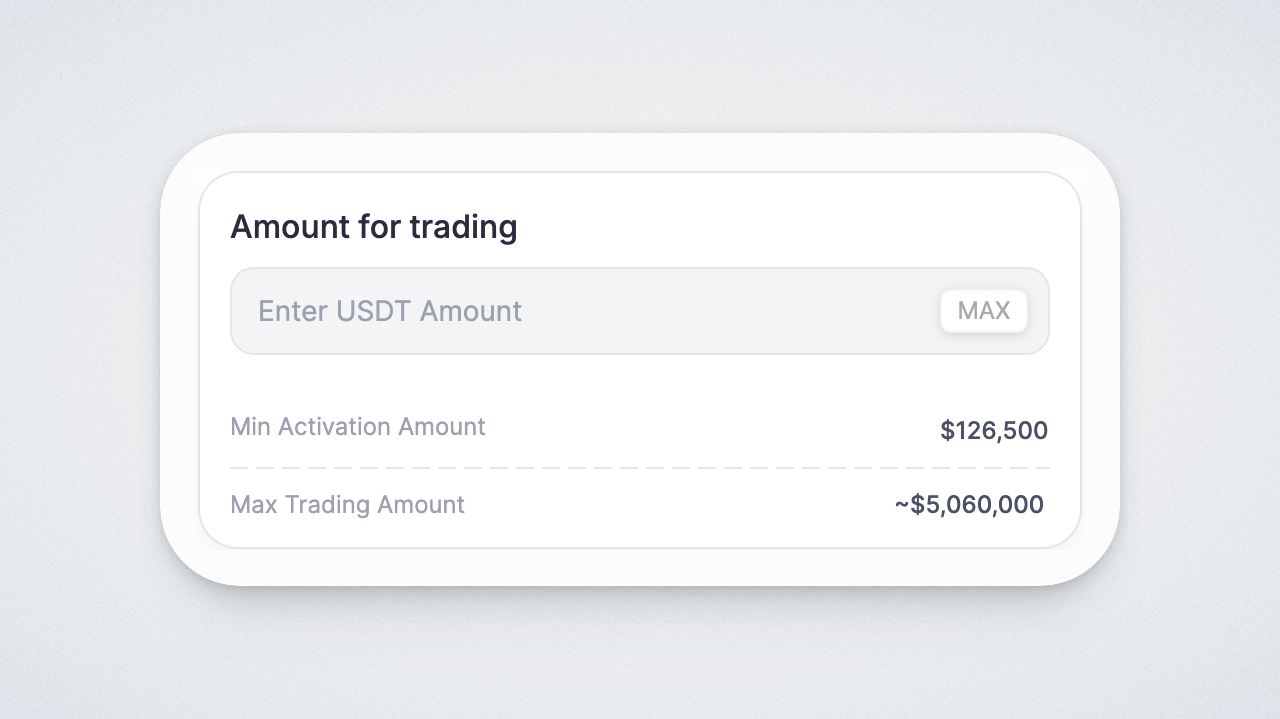
Please note: in addition to the USDT you trade with, your wallet must hold ETH to pay network fees. If there is not enough ETH, you will see an Insufficient balance error when topping up — this means you are short on ETH for gas, not on USDT.
Step 5. Top up your Fee Balance
Now let's talk about the Fee Balance. This is a separate reserve used to pay network fees on every trade. When the bot makes a transaction on the Ethereum network, the transaction cost is deducted from here rather than from your trading balance — these are two different balances.
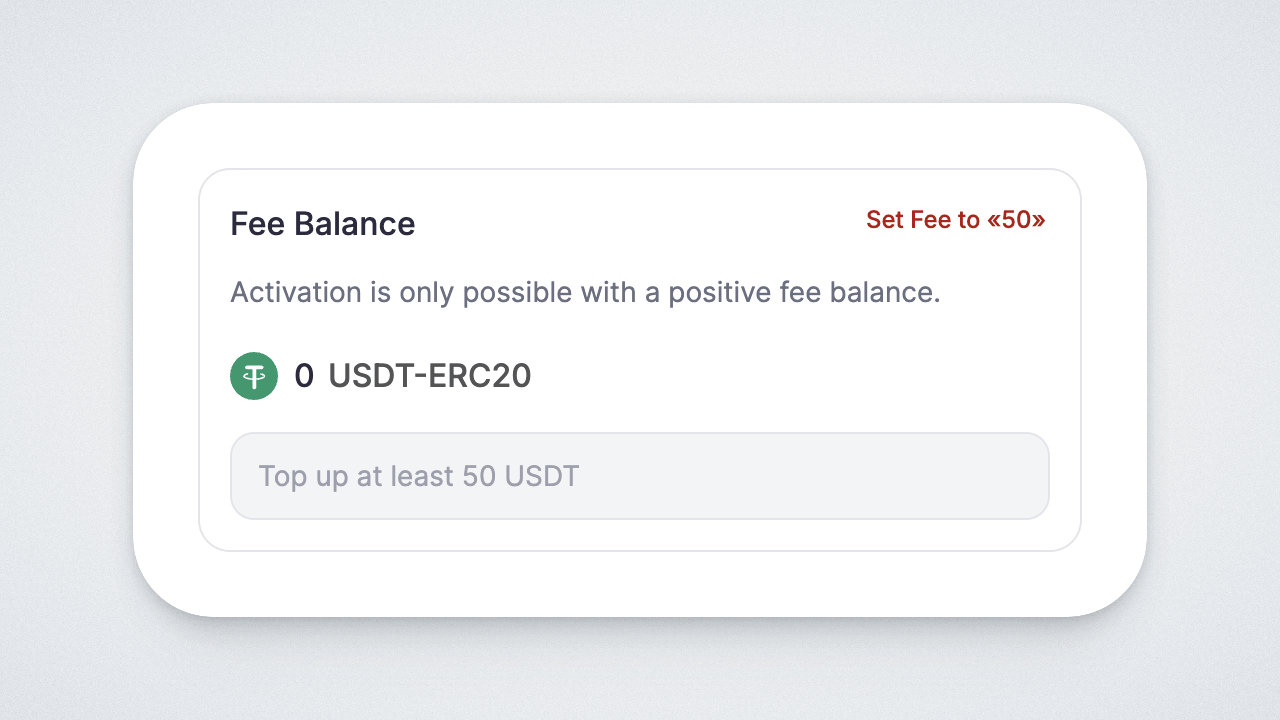
Topping up the Fee Balance also requires confirming transactions in the UWallet app — we explain exactly how this works in the next step.
Topping up the Fee Balance, just like the Trading Balance, is itself a transaction on the Ethereum network and requires ETH in your wallet to cover the fee. Make sure your ETH balance is sufficient for all activation transactions (there may be up to 4 of them). If you run out of ETH mid-process, activation will be interrupted — top up your wallet with ETH and repeat this step.
Step 6. Confirm activation
Since the funds in the wallet belong to you and not to the platform, the smart contract cannot debit them without your permission. That is why, for every amount you transfer to the smart contract, you first need to grant permission (Approve) and then confirm the transfer itself (Transfer). Activation takes some time and may require up to 4 confirmations in the UWallet app — confirm each request. This applies not only to activation: any balance top-up requires you to confirm all transactions in the UWallet app.
Each request will appear both in a pop-up window on the website and in the UWallet app — confirm them one by one without closing the page. Please note: confirmation in the app is quick, but the window on the website may stay on screen for a while longer — this is normal. Wait until the next request appears in the app and confirm it. The process is not instant: there may be pauses between transactions, so please be patient.
If you are offered a choice of transaction speed when confirming, always select the high speed — the transaction will be processed faster.
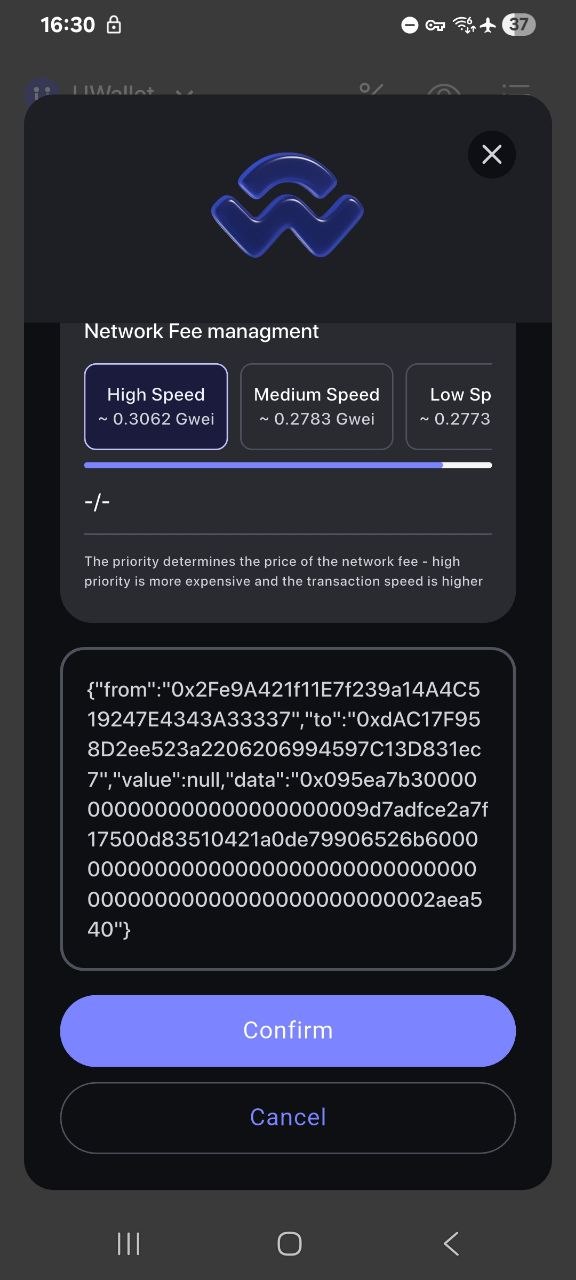
A hash is displayed for each transaction on the website — click it to open the details on Etherscan.
Once all transactions are confirmed, you will need to wait a little: processing speed depends on how busy the Ethereum network is. Balances are not updated instantly — both top-ups and withdrawals may take from one to several minutes. Do not close the page and do not worry if the result does not appear right away.
All done! Your bot has been moved to the DEX and is trading on Uniswap. Two important reminders: keep your wallet's mnemonic phrase in a safe place — without it you will not be able to recover your wallet. And remember: withdrawals are only possible to the wallet you used to activate the bot. Happy trading!